A workspace is where all your conversations, channels, contacts, automations, and team members are managed. Every business, brand, or client should have its own workspace.
Follow the steps below to create a workspace in DMLY.
Go to https://dmly.io/
Log in using your registered email address and password.
If this is your first login, DMLY will automatically prompt you to create a workspace.
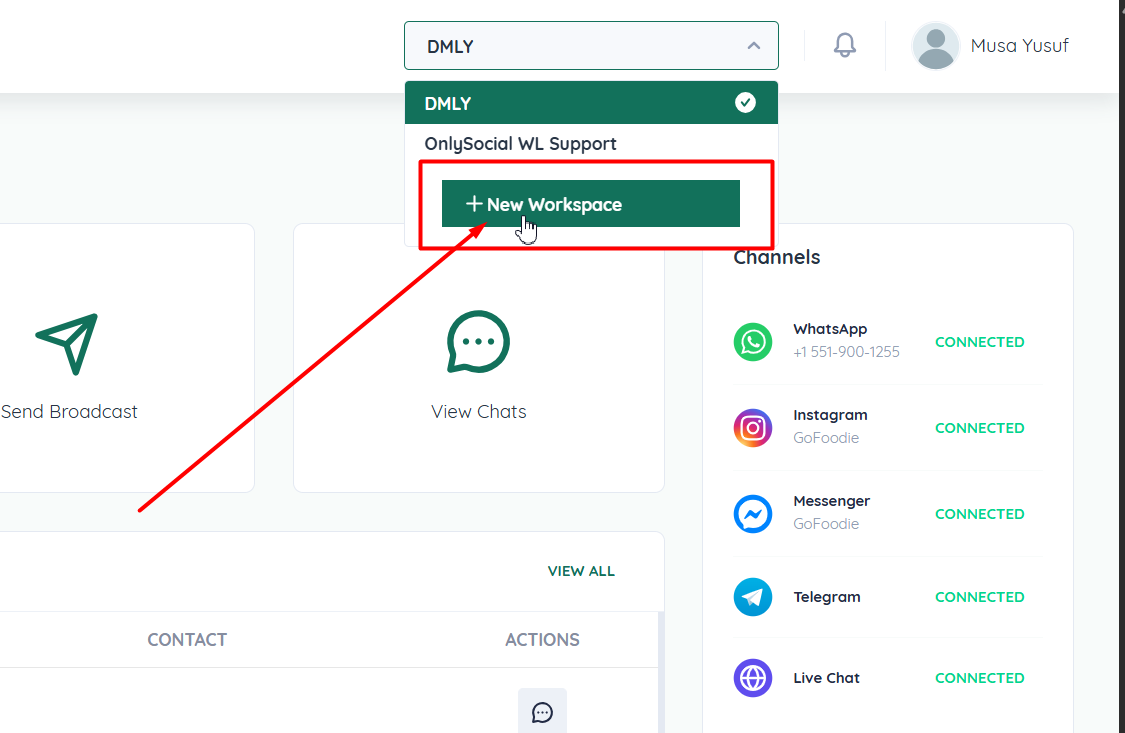
If you already have a workspace:
Go to Dashboard
Click on the Workspace Selector at the top of the screen
Click Create Workspace
Enter a Workspace Name
This can be your business name, brand name, department, or client name.
Review the details to ensure accuracy.
Click Create Workspace
DMLY will instantly set up the workspace for you.
Once created, you will be redirected into the new workspace dashboard.
After your workspace is created, you can:
Connect messaging channels (WhatsApp, Instagram, Messenger, etc.)
Add team members and assign roles
Set up automations and chatbots
Manage contacts and conversations
Send broadcasts and view reports
Each workspace operates independently, keeping data separated and organized.
DMLY allows you to create and manage multiple workspaces under one account.
This is useful if you:
Manage multiple brands
Run different business units
Offer services to multiple clients or teams
You can switch between workspaces at any time from the workspace selector.
Once your workspace is ready, the next step is to:
Connect your first messaging channel
Invite team members
Start receiving and replying to messages
